7 Deadly Mistakes To Avoid When Painting Your Office
November 18, 2019
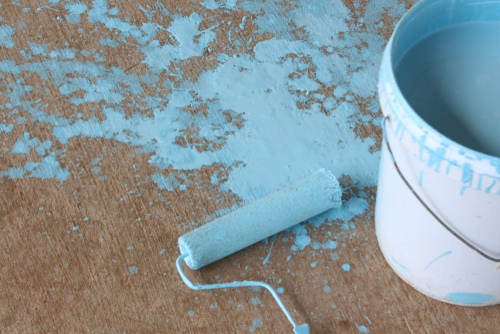
Why Do People Paint Their House For The New Year?
November 18, 2019How To Fix Hairline Crack In Walls
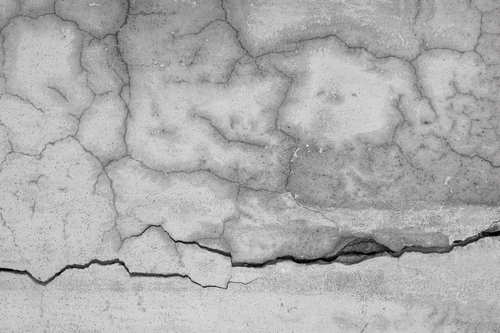
Taking care of cracks on the drywall, which is also known as the wallboard is extremely necessary as this part of your house sustains damage rather quickly. A hairline crack is usually caused by movements in your home’s foundations or framing. The latter component expands or contracts in accordance with climatic changes in the region you may be living in. These types of cracks are telltale, and it is very essential to deal with them before they get the time to widen even more. To which end, this article has been designed to provide step by step instructions on how to fix a hairline crack in your house’s wall.
· To begin with, it is important to obtain an ideal compound that you can use in such operations. Ideally, you should only settle for a flexible silicone caulk as such a compound is noted for stretching as the crack widens and narrowing with normal movements of your house.
· The very first step you need to take after you have bought this compound is to comprehensively clean the crack area. Take time to clean the drywall and try your level best to eliminate any loose debris such as plaster or grit that you may see. This of course is totally dependent on just how wide the hairline crack is. While doing this you should also take time to take off old tape, paint textures and even nail heads.
· The second step is to fashion a shallow trench around the crack that should overlap the crack itself. You can make use of a utility knife to create sufficient surface area on which the silicone caulk can properly adhere to.
· Next use a mesh tape in those areas of the hairline crack that are angled and deep. These regions will definitely require a lot of the compound for you to appropriately patch them up. While doing this make sure that you attach the mesh tape at least an inch or more over both sides of the crack.
· You can then proceed to apply the silicone caulk into the crack utilizing the utility knife. Make it a point to sweep the knife in a diagonal motion of your arm, while it is in an angled position. This will ensure that the compound can spread and fill the hairline crack in a uniform manner.
· When done you should then permit the silicone caulk to dry as to the exact instructions of its manufacturer.
· Afterwards you can begin to sand the filled area. It is highly advisable that you make use of a diminutive wooden block on which you can conveniently wrap a sand paper. Doing this will offer you an even and flat surface to conduct the sanding process.
· You should then immediately proceed to pass a moist sponge over the hairline crack area. When it dries up again, you should carefully check for any grooves or any other blemishes, which may appear over the crack. If there are any continue to sand it until they disappear.
· The next step you should undertake is to apply a second coat of the silicone caulk. All the while making sure that it is thinner than the first layer. After accomplishing this, allow this second coat of the compound to dry before proceeding to sand this area once again. Once done you can repaint the spot and you will be certainly good to go.
· One important thing you need to always bear in mind while painting is that you should never use a brush for such touch ups. This is simply because your using a painting brush can make the paint to dry up with conspicuous brush strokes. You should only make use of a brush if the wall was initially painted using a brush. On the other hand, if you wish to match up the particular finish texture of your wall was painted using a roller, you can utilize an appropriate foam brush or a paint pad.
· If the crack should return or perhaps even widen, this may be an indication that your house is settling much more quicker than you once thought. On the flipside, it could also imply that the structural integrity of your home has been violated. In any of these scenarios , you will certainly be necessitated to contact an experienced building contractor as soon as possible to rectify the situation.
· Should you for one reason or the other feel that such undertakings are beyond your skills or will inconvenience you, you can enlist the assistance of professional painting services in the area you live in. This will not only make sure that the job is executed in a totally professional manner, but will also take away the risk of botching it if you attempted to do it by yourself.
· There happen to be quite a large number of painting contractors in the country, and it can therefore be wise to only settle for the right one that matches your exact requirements.
· This will certainly entail accessing top quality painting services at a cost effective price tag. Above all such services should also integrate a high level of professionalism and value added benefits.
· To this end, you should thus take the necessary time to evaluate the various credentials of several painting contractors to arrive at the very best one for your distinct circumstances.
· You can begin by making inquiries on the better business bureau (BBB) and even the local lawyer general’s office. In regards to unearthing any unresolved complaints that the contractors were implicated in.
· After conducting such a vetting, you will end up with a single painting services contractor. However, you should not call it quits. Next make sure that he can furnish you with a complete contract, which among other things should contain his name, address, office and mobile numbers as well as their permit number.
· This given contract should also touch on details of the contractors painters liability and specialist compensation certification. Both of which can come in very handy if any mishap should occur while the job is underway.